Quick Product Navigator Slide App – User Guide
This guide will help you configure the navigation slider, create rules, and enable the app on your Shopify store.
Step 1: Configure App Settings
Set up the navigation slider and customize its appearance.
Access Settings
- Go to Shopify Admin → Apps
- Open the Quick Product Navigator Slide App
- Navigate to the Settings tab
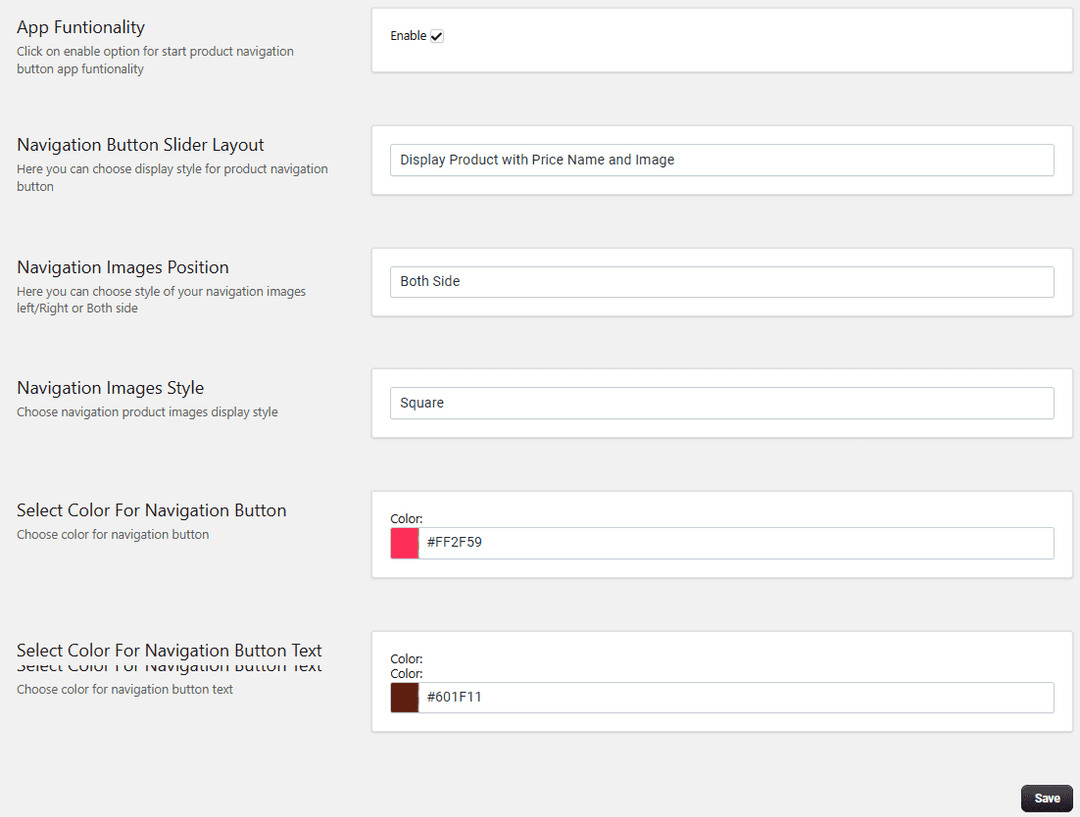
General Settings
-
Enable App: Turn ON to activate the product navigation slider.
-
Navigation Button Slider Layout: Choose the display style for the navigation buttons.
-
Navigation Images Position: Select where navigation images appear:
Left Right Both sides
-
Navigation Images Style: Choose image shape:
Square Rounded
-
Navigation Button Colors: Button Color – Set background color Text Color – Set button text color
-
Cancel Button Label: Add a custom label for the cancel button.
Example: Cancel
Save Settings: Click Save to apply all changes.
Step 2: Create Navigation Rules
Rules allow you to control where and how the slider appears.
Add a New Rule
Go to the Rules section Click Add Rule
-
Enable Rule: Turn ON to activate the rule.
-
Rule Title: Enter a name for easy identification.
-
Set Product Limit: Define how many products appear in the slider. Example: 1–10 products
-
Apply Rule To: Choose where the navigation slider should appear:
Entire Store, All Pages, Specific Pages, All Products, Specific Products, All Collections, Specific Collections,
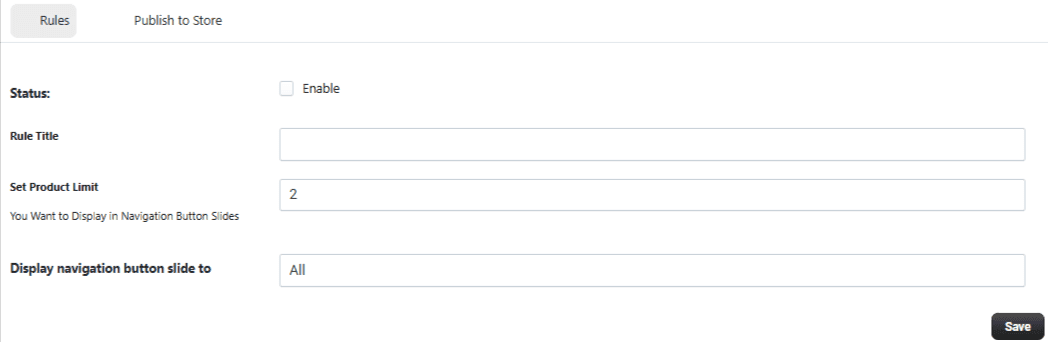
Save Rule: Click Save to apply the rule.
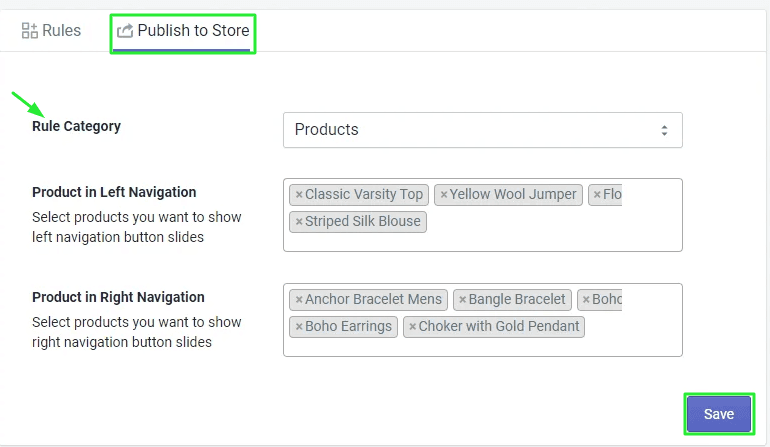
Step 3: Publish to Store
Once you have configured your general settings and created your rules, the Publish to Store tab allows you to manually curate which products appear in your navigation sliders.
Configure the following options to define your store's navigation:
-
Rule Category: Use this dropdown menu to categorize your selection (e.g., "Products").
-
Product in Left Navigation: Click in this field to search for and select the specific items you want to feature in the left-hand navigation button slides.
-
Product in Right Navigation: Click in this field to search for and select the specific items you want to feature in the right-hand navigation button slides.
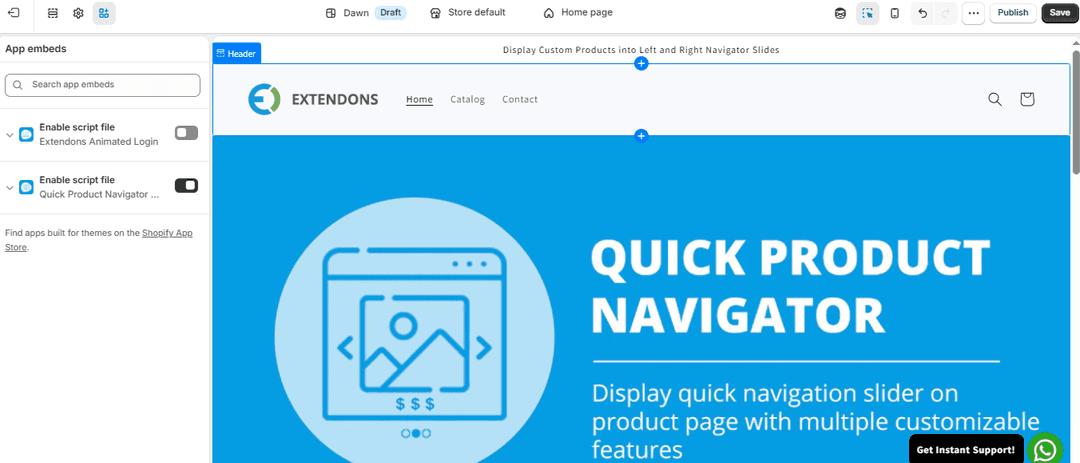
Step 4: Enable App Embed (For Shopify 2.0)
Activate the app on your storefront.
Steps:
- Go to Shopify Admin
- Navigate to Online Store → Themes
- Click Customize
- Open Theme Settings → App Embeds
- Find the app
- Enable the Script Files Button
- Click Save
Setup Complete
You have successfully:
- Configured the product navigation slider
- Customized button styles and layout
- Created rules for display control
- Enabled the app on your store
Customers can now quickly navigate between products, improving browsing experience and engagement.