Redirect After Login App – User Guide
This guide will help you set up automatic redirections for customers after registration, login, and logout.
Step 1: Access the App
- Go to your Shopify Admin.
- Navigate to Apps.
- Select the Extendons Redirect After Login App.
- Open the app dashboard.
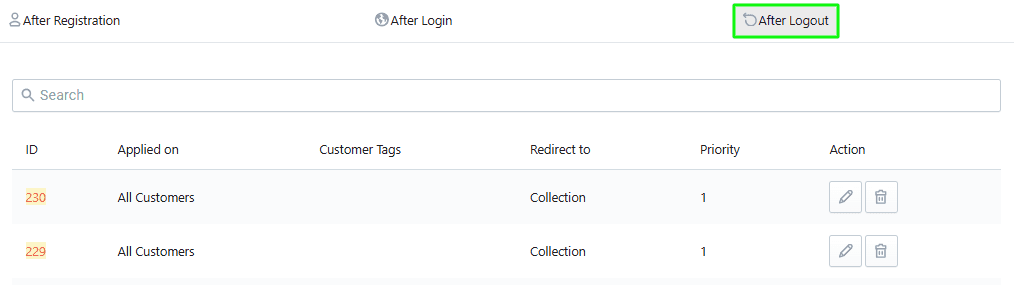
You will see three main tabs:
- After Registration
- After Login
- After Logout
Each tab allows you to create redirect rules.
Step 2: How to Create Rules
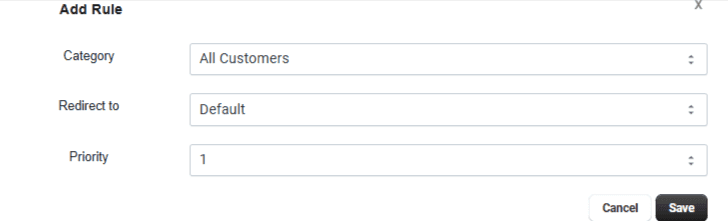
Redirect After Registration
Set where customers should be redirected after they register.
Steps:
- Click on the After Registration tab.
- Click Add Rule.
- Configure Rule:
- Apply On – Select All Customers
- Redirect To – Choose destination: Default, Home Page, Product (select product), Collection (select collection), Page (select page), Last Visited Page
- Priority – Set rule priority (1 = highest)
- Click Save.
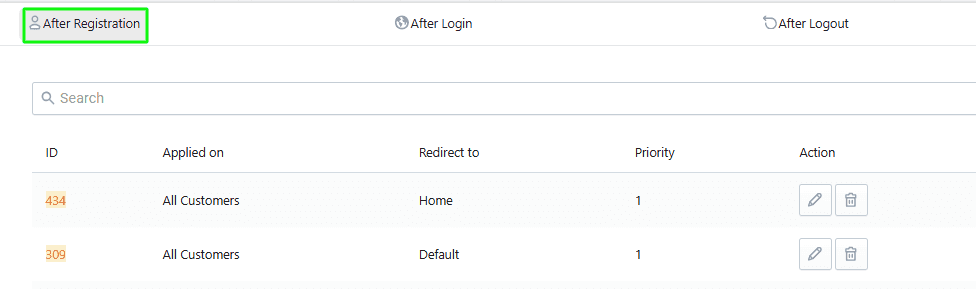
Redirect After Login
Set redirection after customer login.
Steps:
- Click on the After Login tab.
- Click Add Rule.
- Configure Rule:
- Apply On – Select All Customers
- Redirect To – Choose destination: Default. Home Page, Product, Collection, Page, Last Visited Page
- Priority – Set priority (1 = highest)
- Click Save.
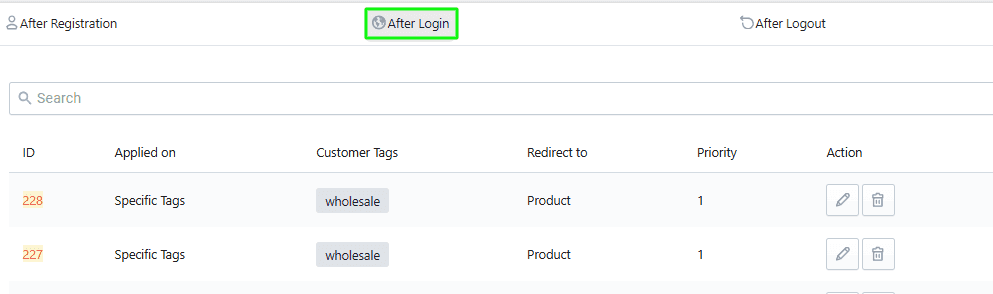
Redirect After Logout
Set redirection after customer logout.
Steps:
- Click on the After Logout tab.
- Click Add Rule.
- Configure Rule:
- Apply On – Select All Customers
- Redirect To – Choose destination: Default, Home Page, Product, Collection, Page, Last Visited Page
- Priority – Set priority (1 = highest)
- Click Save.
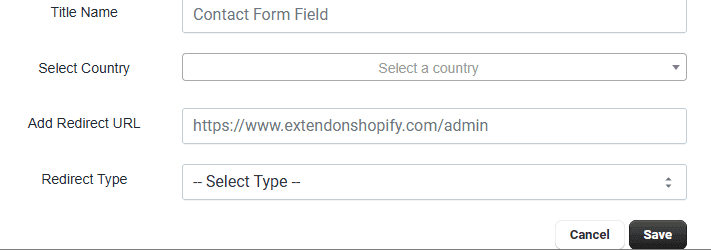
Step 3: Create GEO Redirects
Use this section to redirect visitors from specific countries to a custom URL.
Steps
- Enter Title Name: Add a name for the redirect rule.
- Select Country: Choose the country to which the rule applies.
- Add Redirect URL: Enter the destination URL.
- Select Redirect Type: Choose the redirect type (e.g., 301 or 302).
- Click Save: Save the GEO redirect configuration.
Customize Pop-up
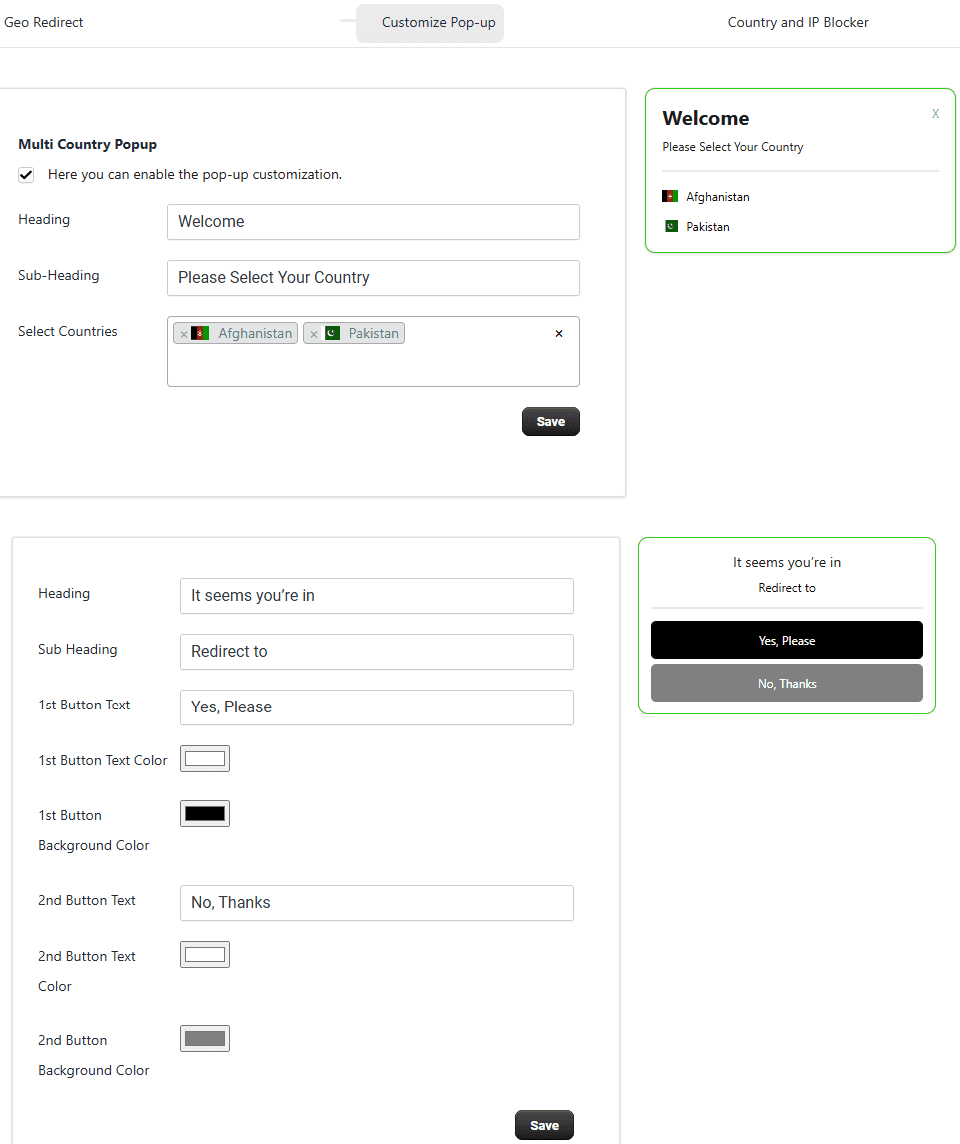
Use the Customize Pop-up tab to configure and personalize the country selection and redirection pop-ups displayed to visitors.
Multi Country Pop-up
- Enable the Multi Country Pop-up option.
- Enter the Heading and Sub-Heading text.
- Select the countries you want to display in the country selection pop-up.
Redirect Confirmation Pop-up
- Enter the Heading and Sub Heading text.
- Customize the button labels.
- Configure the text and background colors for both buttons.
- Click Save to apply the changes.
Country and IP Blocker
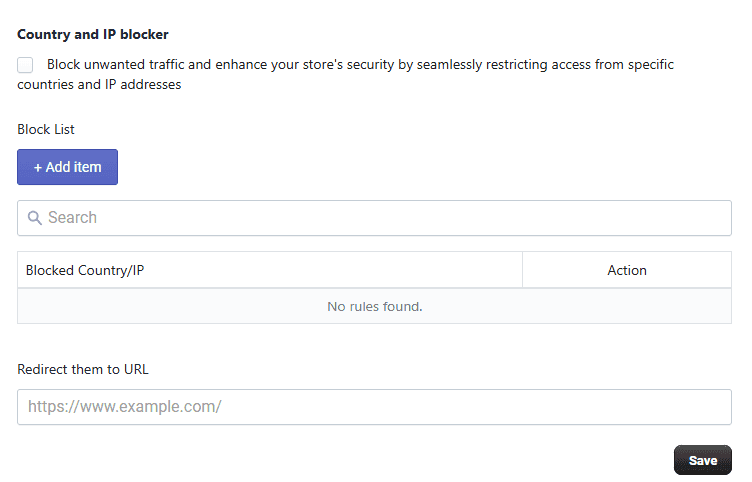
Use the Country and IP Blocker feature to restrict access from specific countries or IP addresses.
- Enable the blocker using the checkbox.
- Click Add Item to add countries or IP addresses to the block list.
- Use the search bar to quickly find existing rules.
- Optionally, enter a URL to redirect blocked visitors.
- Click Save to apply your changes.
Step 4: SEO Redirects
The SEO Redirects section helps you manage broken URLs and create redirects to ensure visitors and search engines always reach the correct pages.
Creating a Custom Redirect
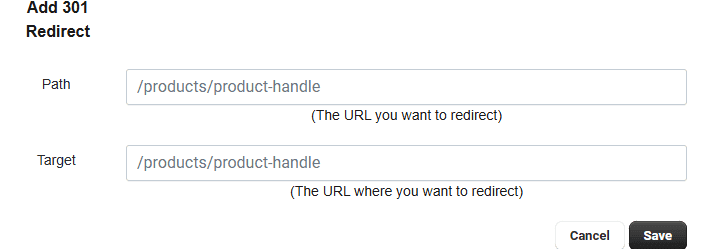
To add a new redirect, click Add 301 Redirect and complete the following fields:
- Path – Enter the original URL that you want to redirect.
- Target – Enter the destination URL where visitors should be redirected.
After entering both URLs, click Save to create the redirect.
Redirect Categories
- 404 Errors (Unfixed) – Displays URLs that visitors have attempted to access but could not be found. These URLs have not yet been redirected.
- Fixed 404 Errors – Shows broken URLs that have already been resolved with a redirect.
- Ignored 404 Errors – Lists 404 URLs that you have chosen to ignore and not redirect.
- Custom Redirects – Displays all manually created redirects that send visitors from one URL to another.

Step 5: Enable App Embed (For Shopify 2.0)
To activate the app on your store, enable it in your theme.
Steps:
- Go to Shopify Admin.
- Navigate to Online Store → Themes.
- Click Customize.
- Open Theme Settings → App Embeds.
- Find the app.
- Enable the Script Files Button.
- Click Save.
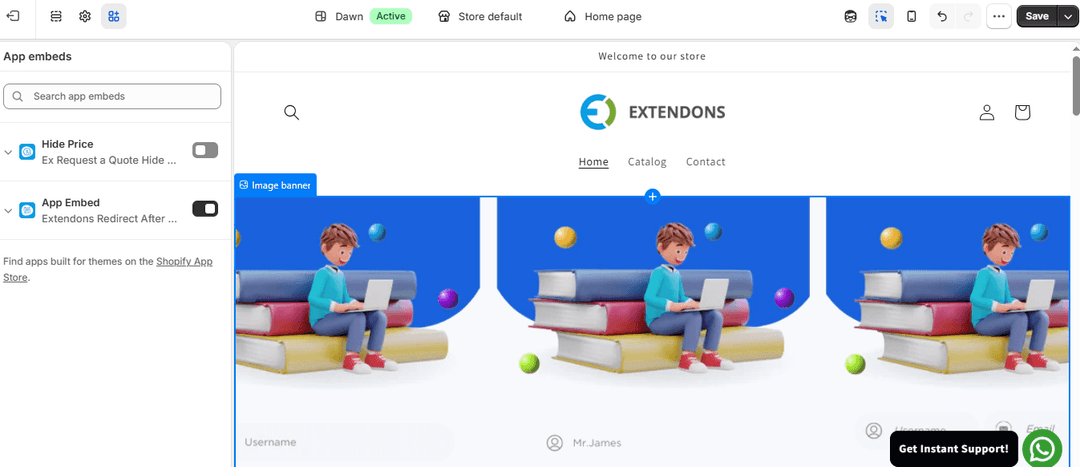
Note: Only enable this option if you are using a Shopify 2.0 theme.
Setup Complete
You have successfully:
- Configured redirects for registration, login, and logout
- Created and prioritized rules
- Enabled the app on your store
Your customers will now be redirected to the desired pages automatically, improving navigation and user experience.