Quantity Selector Button App – User Guide
This guide will help you customize the quantity selector button, create rules, and enable the app on your Shopify store.
Step 1: Configure General Settings
In this step, you can enable the app and customize the appearance of the quantity selector.
Access Settings
- Go to Shopify Admin → Apps
- Open the Quantity Selector Button App
- Navigate to General Settings
Enable App Turn ON to activate the quantity selector on product, collection, and cart pages.
Customize Quantity Selector Button
Button Style: Choose the design style for increment (+) and decrement (−) buttons.
Button Label Settings:
- Label Text – Add custom text
- Text Color – Choose label color
- Font Size – Adjust text size
- Font Style – Select font
Quantity Field Settings:
- Background Color – Set field background
- Text Color – Set number color
- Field Width – Adjust width
Button Appearance:
- Background Color – Set button color
- Border Color – Define border color
- Border Width – Adjust thickness
Customize Increment & Decrement Buttons
- Increment (+) Color – Highlight increase button
- Decrement (−) Color – Differentiate decrease button
Quantity Text Size: Adjust the size of the quantity number for better readability.
Display Settings: Choose where to show the quantity selector:
- Product Page
- Collection Page
- Cart Page
- Or apply on all pages
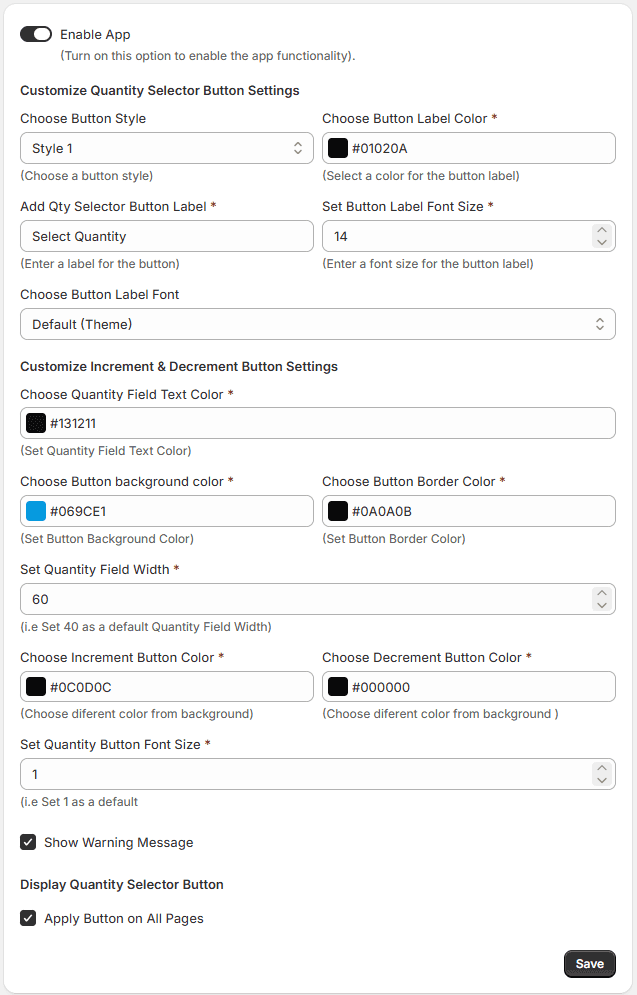
Save Settings: Click Save to apply all changes.
Step 2: How to Create Rules
Rules allow you to control quantity limits and behavior.
Add a New Rule Go to the Rules section Click 'Add Rule'
Rule Settings
- Enable / Disable: Activate or deactivate the rule.
- Rule Title: Enter a name for easy identification.
- Minimum Quantity Limit: Set the minimum quantity required for purchase.
- Maximum Quantity Limit Set the maximum quantity allowed.
- Interval (Step Quantity): Define quantity increments (e.g., 1, 2, 3).
- Priority: Set rule priority when multiple rules apply. (Lower value = higher priority)
- Custom Messages Minimum Quantity Message – Show when below limit Maximum Quantity Message – Show when exceeding limit
Apply Rule To: Choose where the rule applies:
- Entire Store
- Specific Products
- Collections
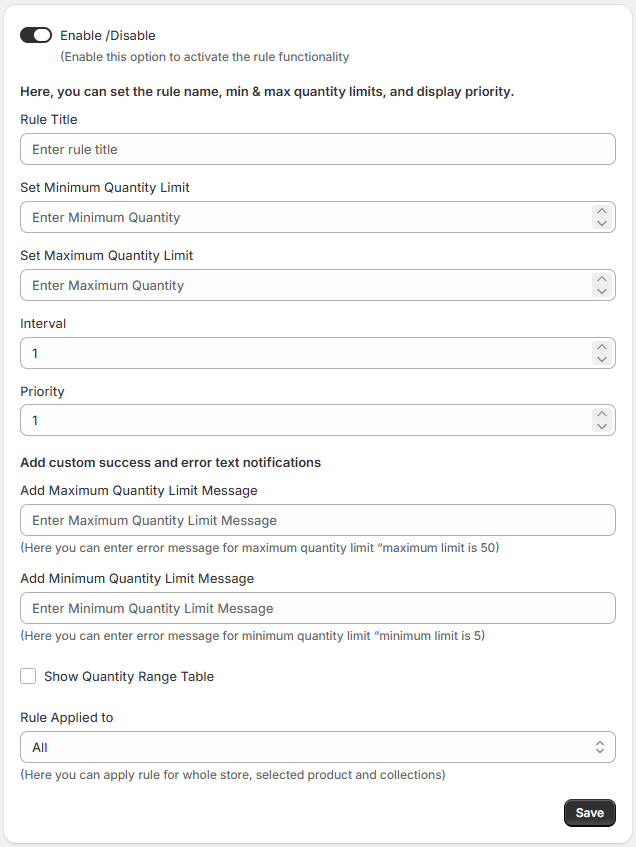
Save Rule: Click Save to activate the rule.
Step 3: Enable App Embed
To apply the app on your storefront, enable it in your theme.
Steps:
- Go to Shopify Admin
- Navigate to Online Store → Themes
- Click Customize
- Open App Embeds
- Find Quantity Selector App
- Toggle it ON
- Click Save
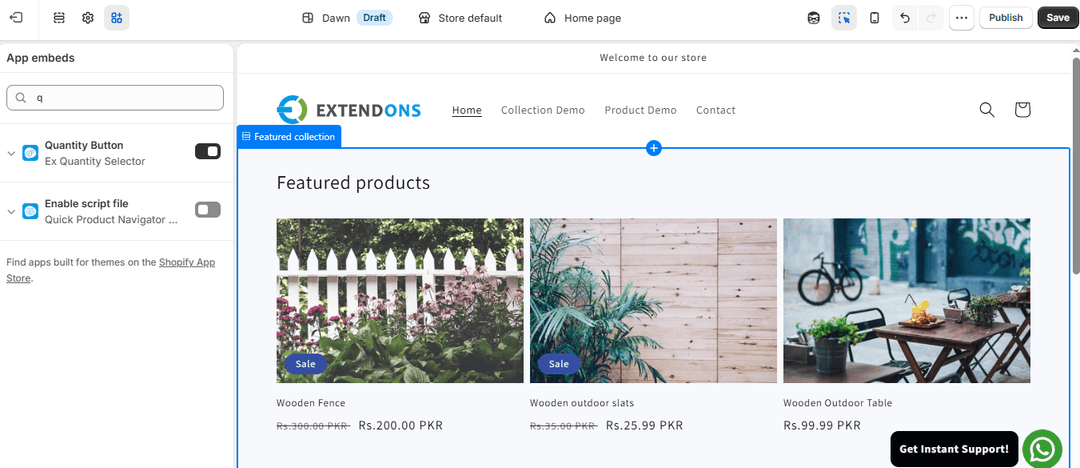
Setup Complete
You have successfully:
- Customized the quantity selector design
- Set quantity rules and limits
- Enabled the app on your store
Your customers can now easily adjust product quantities with a better and more user-friendly experience.