Pay What You Want App – User Guide
This guide will help you configure the app, create pricing rules, and activate it on your Shopify store.
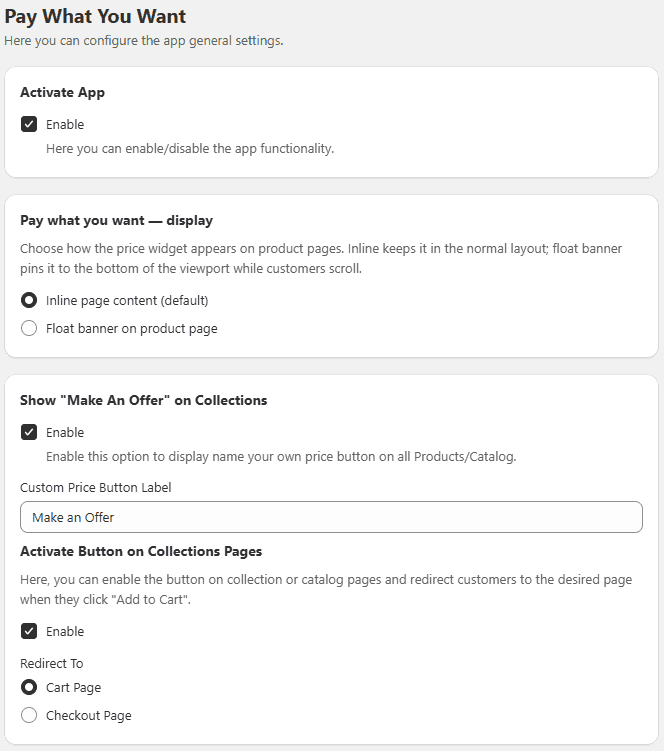
Step 1: Configure App – General Settings
The General Settings allow you to control how the “Make an Offer” or custom pricing feature appears on your store.
Access Settings
- Open your Shopify Admin.
- Go to Apps.
- Select the Pay What You Want App.
- Click on App Configuration.
- Configure the following options.
- Click Save after making changes.
Activate App Enable or disable the app functionality.
Choose how the price widget appears on product pages. Inline keeps it in the normal layout; float banner pins it to the bottom of the viewport while customers scroll.
- Inline page content (default)
- Float banner on product page
Show “Make an Offer” on Collections Enable to display the Name Your Price button on collection/catalog pages.
Activate Button on Collection Pages Enable the button on collection pages and choose where customers are redirected:
- Cart Page
- Checkout Page
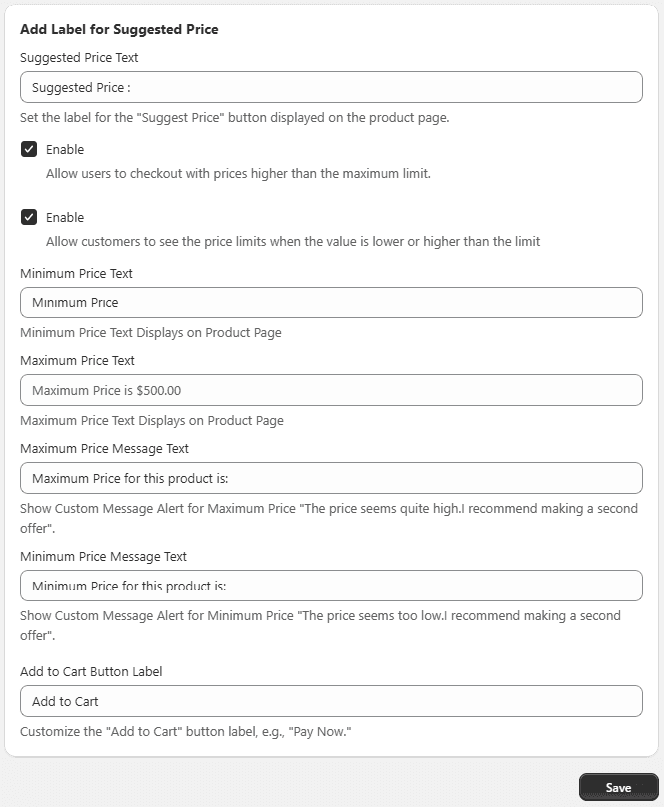
Suggested Price Label Set a custom label for the suggested price shown on product pages.
Allow Higher Price Checkout Allow customers to enter and checkout with a price higher than the maximum limit.
Show Price Limits Enable to display messages when entered price is below minimum or above maximum limits.
Custom Price Label Add a custom label for minimum or custom pricing fields on the product page.
Custom Messages
- Maximum Price Message Example: The price seems quite high. Please make another offer.
- Minimum Price Message Example: The price is too low. Please increase your offer.
Customize Add to Cart Button Change the label of the button. Example: Pay Now
Step 2: Create Pricing Rules
Rules allow you to control pricing behavior for specific products or collections.
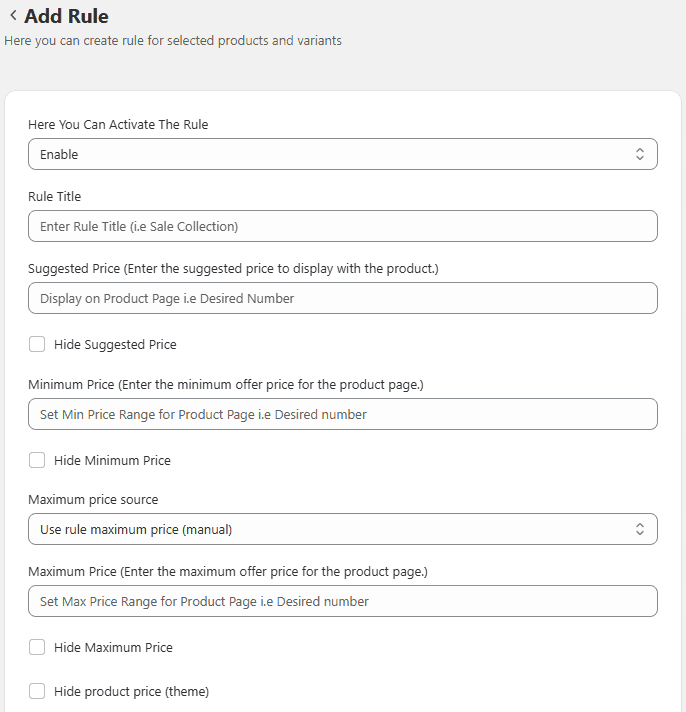
Create a Rule Go to the Rules section. Click Add Rule.
Rule Settings **Activate Rule Enable the rule to apply it on your store.
Rule Title Enter a name for the rule. Example: New Collection Pricing
Suggested Price Set a suggested price to guide customers.
Maximum Price Set the highest allowed price.
- Option to hide the maximum price label
Minimum Price Set the lowest allowed price.
- Option to hide the minimum price label
Price Input Label Customize the label for the pricing field. Example: Add Your Own Price
Default Pricing Options Choose how the price is displayed:
- Default Product Price
- Minimum Price
- No Default Price
Price Step Value Set price increments (e.g., 5, 10). Customers can only enter values in defined steps.
Exempt Charges
- Exempt Shipping Charges – Disable shipping fees (useful for digital products)
- Exempt Tax Charges – Disable tax if not required
Apply Rule Select where to apply the rule:
- Products
- Product Variants
- Product tags
- Collections
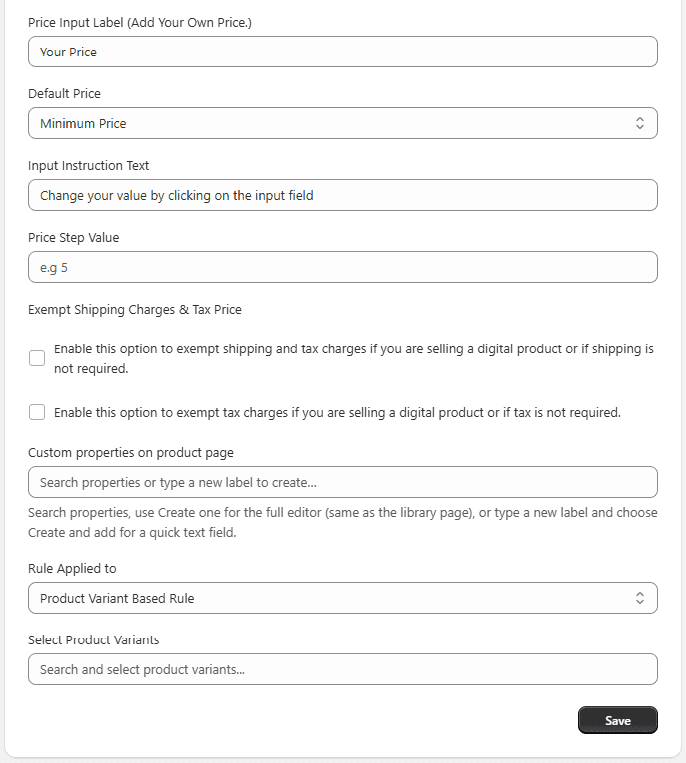
Save Rule Click Save to apply the rule.
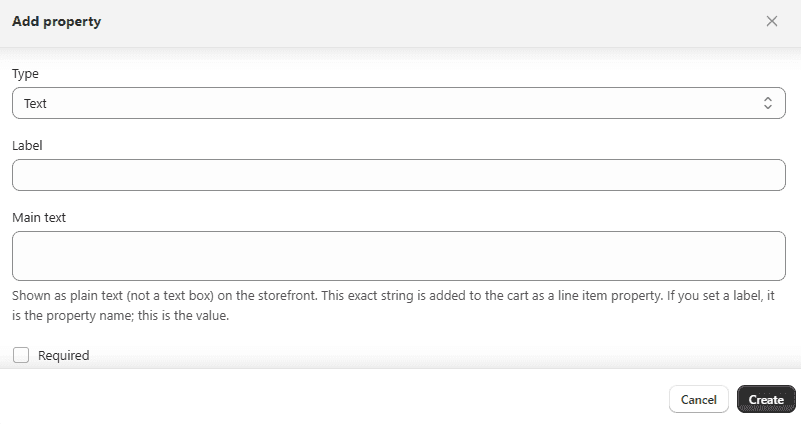
Step 3: Custom properties
From the app admin panel, navigate to the Custom Properties tab and click Add Custom Field. Here, you can create multiple custom fields and assign them to specific rules or inline banners to collect additional customer information along with the order. Create custom fields with a live preview feature, and easily edit or delete them directly from the custom properties page.
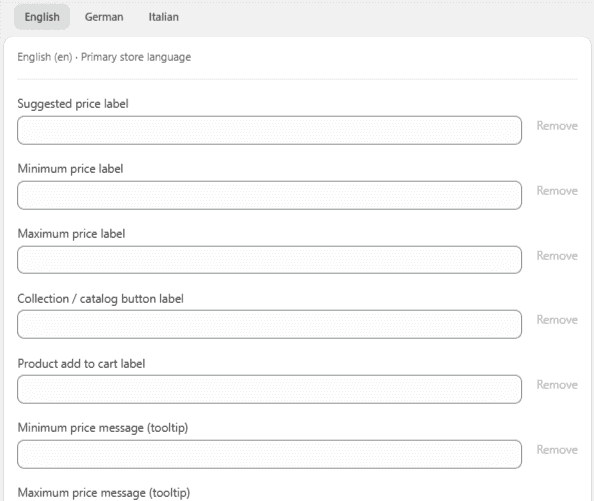
Step 4: Multi Lingual Translation
The app supports translations for all labels and widgets in multiple languages. If your local language is not available in the list, feel free to contact our support team for assistance. In this way, you can display the form and the “Pay What You Want” offer in your local language for a better customer experience.
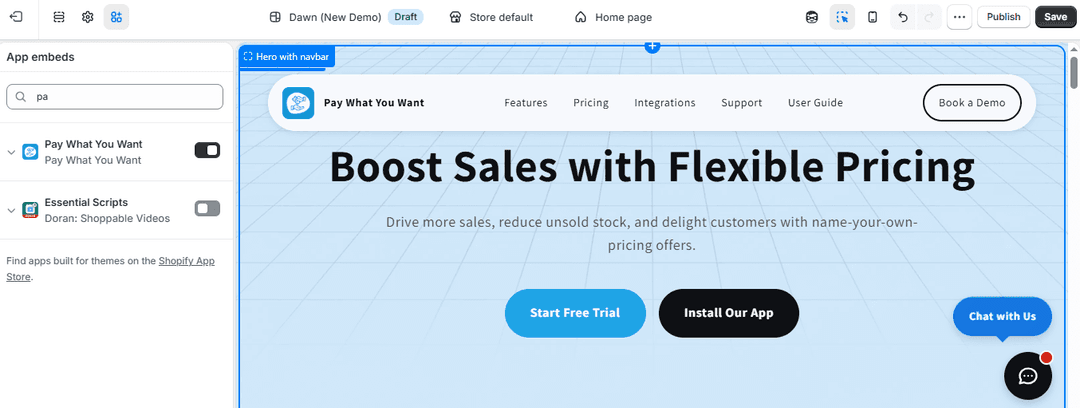
Step 5: Enable App Embed (For Shopify 2.0)
To display the app on your storefront, enable it in your theme settings.
Steps:
- Go to Shopify Admin.
- Navigate to Online Store → Themes.
- Click Customize.
- Open Theme Settings → App Embeds.
- Find the Pay What You Want App.
- Toggle Enable App Embed ON.
- Click Save.
Note: Only enable this option if you are using a Shopify 2.0 theme.
Setup Complete
You have successfully:
- Enabled custom pricing functionality
- Configured pricing behavior and messages
- Created rules for products and collections
- Activated the app on your store
Customers can now enter their own price, improving engagement and flexibility in purchasing.